Sunday, 10 March 2013

V1 ready for take off!

V1 ready for take off!

It's been a while coming but the V1 Flying Bomb miniature is now ready for take off!


This miniature is a 1:100 scale model of the V1 and is compatible with Flames of War tabletop game. It's cast with a white metal that contains lead so it's unsuitable for small children.

As you can see, the V1 comes in a number of parts that require cleaning and assembly but with a steady hand - and superglue - you'll be ready to paint it in no time!

It measures 80mm x 53mm x 14mm and comes supplied with building instructions and information about the real V1.

If you want one, it's for sale on eBay here!

I'm mid way through painting one, and as soon as I finish I'll post it on the blog here. I'm painting it based mainly on this image from the V1 at Imperial War Museum. My V1 will hopefully look the same but less battered about!

Edinburgh Castle

I had an email a little while ago from an amazing model maker called Jack saying that one of my 1:100 Police Box miniatures will be used in his model of Edinburgh castle. I'll shut up now, just look at the pictures he sent!


It looks terrific I think you'll agree. He made the entire thing from scratch. The cliff was made with a combination of  polystyrene and plaster and the castle itself was made using Linka moulds for some stone work and Jack's own incredible modelling skills. I hope to see updated photos in the future. It looks like a great project that's really coming along and looking great!


Tuesday, 1 January 2013

Summon in the New Year

The Demon Summoning Circle

Happy New Year to you all! I hope each and everyone of you had a joyful and  frolicsome holiday season full of laughter and fun... but that time is now over and Yeoman Models is releasing it's largest miniature yet by summoning in the New Year with the Dark Arts! Behold the Demon Summoning Circle!
The Circle itself is sold resin. Measures 14.5cm diameter and 3cm tall. You can customise the five pilers of the pentagram with whatever twisted nightmares you want, but supplied with the resin Summoning Circle are five white metal fire dishes.

I made it so that you can easily place a large 6.5cm wargaming base into the Summoning Circle giving plenty of room for any overhanging legs, arms, claws or tentacles your demons may have! As you can see - is adorned with demonic runes and a pentagram and yes, the weird glyphs on the pillars and the circle do mean something... but I'm not telling.

It's availlible to buy on eBay here.

Painting it was made a lot easier by watching this helpful 'How to Paint Stone' tutorial video in Youtube.  I gave the summoning circle a black undercoat and drybrushed (with a large half inch flat brush) varying shades of grey starting dark and building up lighter and lighter. I gave it a dark green/grey wash before using a small brush to dry brush the white highlights which I found really brought the model to life.

One thing I may try while painting this model again is to take out a scalpel and model files and weather the corners of the five pillars a bit more and I'm toying with the idea of painting the tiles and floor detail with colours and not just keep it all stone.

The fire dishes are white metal so needed some preparation by filing down sprew marks and removing some of the mould lines. Once done, I painted it all with a black undercoat and dry brushed shades of red on the fire then orange and finally yellow. The dishes were painted with copper paint and highlighted with some gold paint. I found painting fire quite difficult. If you have any tips, please message me!

Well that's it for now. I'll be blogging again soon!

Monday, 5 November 2012

Police Box Crazy

Police Box Pewter Pendants

First off I'm now selling a range of Police Box Pewter Pendants! Made famous by Doctor Who's TARDIS, the police box is a great icon that has been made into all sort of things like Purses, Cat Fort and tea-cosies. Now, pewter pendants are on the scene!

They measure 30mm x 12mm x 6mm. Made from lead-free pewter. It is detailed on all four sides and also has a 5mm jump ring attached. You can buy it worldwide from my ebay or Etsy store.

50 Shades of Blue

Recently I have been delighted to receive two great photos from people who have painted up some of the Yeoman Models resin Police Box's.

The first is by Francisco from Spain where this 1:72 Police Box (and soon a 1:56 Police Box) is forming part of a wonderful Victorian England City diorama. The diorama's pretty new at the moment but will soon be filled with colourful Victorian characters. The Peeler's keeping the peace for now, but I think that Jack the Ripper might be around the corner!

The second picture is a work in progress from Illinois, USA. The signs were printed paper stuck on with carpenters glue and all painted using enamel based paints.
All great Police Boxes that The Doctor himself would be proud to travel in I'm sure!

I myself painted a large number of Police Boxes and other miniatures for a model train enthusiast recently. Here they are pained and primed.

A forest of call boxes...


A brigade of call boxes...


Painting Doctor Who

If you want to see some amazing miniature painting work, you must check out this link to some amazing painted work for any Doctor Who fan. Or check out his Photobucket page here. Looking at these images makes me Slitheen green with envy. Check out the work Andy has done on Morbius, The Meddling Monk and The 6th Doctors outrageously colourful costume!  Amazing Stuff. Can't wait to see more of his work.


Operation: Market Garden 

Here are some pictures from our Antipodean brothers from Tasmania. Miles and his Kingston Bunker Rats have made a massive tabletop wargaming layout of the now infamous Operation: Market Garden. The following pictures are showing some work in progress but as you can see it's brilliantly detailed and vast!


They'll hopefully finish it by the end of the year (fingers crossed some of my Nissen Hut miniatures will be included) and if that wasn't enough, they plan to build a bombed-about Stalingrad next year! They are going to need buckets of rubble for that!


Marston Magna

A change of pace from war-torn Europe now to the more serene and gentle miniatures in Somerset's Marston Magna. Click here to see a world of steam trains created by Alan Poole. Alan has done a fantastic job of making this train Layout that is the combination of a permanent build and two exhibition layouts. Click the link and see the photos and diagrams of the build and read all about it.


Epilogue

Well, that's the end of this post! It was a long blog! The up and coming news is that I have made some more miniatures that have all been requested from a variety of miniature fanatics. They involve trains, Victorians and Demons... but not all at the same time. As soon as they are moulded and cast I will no doubt tell you all about them.

Until then, keep rockin'!

Friday, 5 October 2012

V2 Rocket Blast Off!!!

My 1:100 scale V2 Rocket miniature is now on sale! In celebration, I've made a picture of a V2 in full camouflage taking off...


This V2 rocket is a 1:100 scale miniature and compatible with TT Gauge and Flames of War tabletop game. The fuselage is solid resin and the four fins are a tin rich alloy. When built it measures 14cm high! Building instructions and information about the V2 is supplied and you can buy it on eBay here.

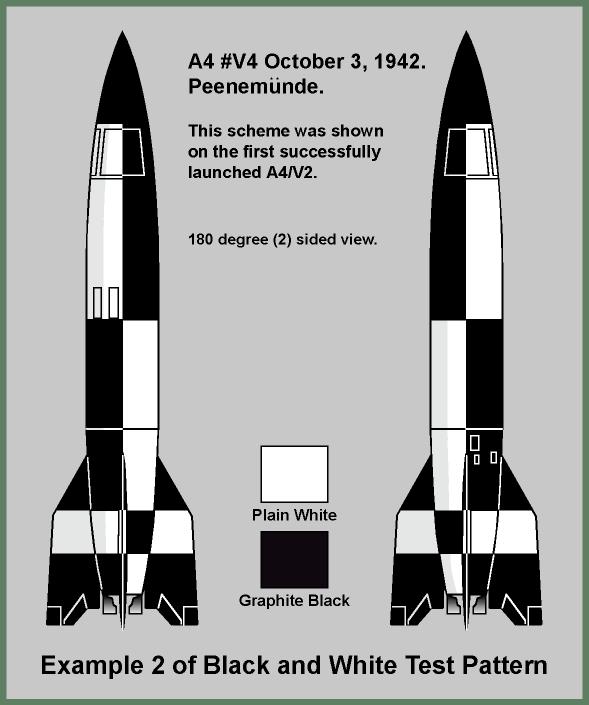
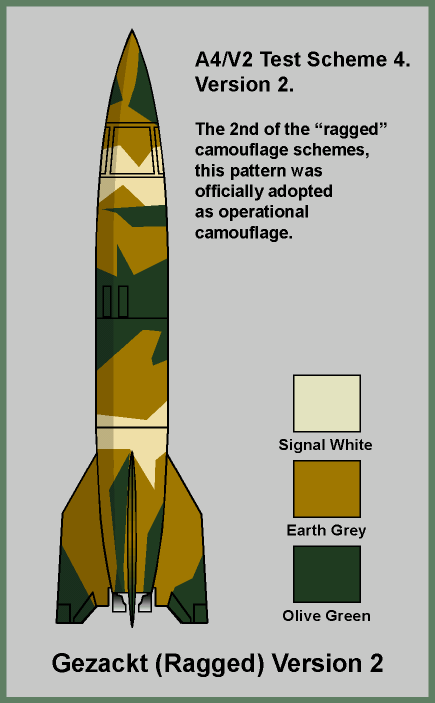
I will be painting the V2 miniature in the coming weeks, and if you are painting your own V2 I recommend this site V2rocket.com for a great collection of seven V2 rocket camouflage markings including the famous black and white 2 and the Ragged Camouflage 2.

Little Police Box

I was asked to paint one of my 1:100 scale Police Boxes for a TT Gauge fan. First off I painted the box with a dark blue which only needed one coat as the resin itself was blue already! I then covered it with a dark wash and dry brushed it with a lighter blue. I thought the little windows at the top would be an absolute pain to fill in, but if you take some watered down white paint on a thin brush and poke it into the windows, it fills them up lovely without getting onto the tricky window frame too much. As the paint is a little watery, you may have to give the windows a couple of coats.


Deciding on the colour of the long light on all four sides was a little tricky. Most Police Boxes I looked at online had the long strips as black with white writing, but as the 1:100 scale, four black bars looked odd and it was far too small to paint the words on! But I found that white worked a lot better. I think the black would work if I had some custom decals with the famous POLICE PUBLIC CALL BOX sign on the top and on the front door. If you want to make your own custom decals for a Police Box, there is a full set of Police Box signage on the Lego Site Brickshelf right here.

Then to finish it's just detailing with white on the lamp, grey for the base and some silver on the lock and door handles.

JUDGE DREDD MINIATURES

If like me you are a fan of Judge Dredd (Have you seen the new film? It's awesome! See it!) you may be interested that the Judge Dredd Miniatures game is expanding and it's on kickstarter! Only 7 days left citizen, so get over to The Big Meg now to pledge and get some drokking great Mega City 1 goodies!

Wednesday, 12 September 2012

Hello,
A bit of news, a bit of eBay, a bit of painting and also a bit of time and space travelling for today's blog post. Let's get started!

First off, the Phone boxes I mentioned last post are now on eBay! As well as some unpainted ones, I have also painted ones for sale.


When I painted the K9 Phone box, I found that giving it a good black primer coat first was the best way to go. The black would be the colour of the windows, so rather than painting in each windowpane individually which would be very difficult, painting just the red of the window frames and box while leaving the windows black would lead to far better results. After the black undercoat, I painted a couple of coats of red before the white detailing on the top and the silver of the handle, then a dark wash before dry brushing the entire thing with more red. Painting the Postbox and Phone Box are pretty similar.

With the RAC and AA boxes, you have to be very gentle painting the badges. Thick paint will ruin the embossed detail but too watery a paint will fill the detail also. So when painting the AA and RAC call boxes take care to get the paint thickness just right and keep a steady hand! Painting yellow onto black is a headache as the yellow shows up green and will need many many coats of paint to ensure the black paint doesn't show through. I found that creating a small mix of 2 parts yellow, 1 part white and 1 part metallic gold acrylic paint did a good job of looking yellow and blocking out the black in only one or two coats. If you have other ideas about the best way of painting yellow onto black, drop me a line!

Dry brushing with a dark grey on the black AA Call Box is a must and it really helps bring out the shape of the unusual roof. A dark wash on the RAC box really adds definition to the woodwork around the entire structure.

I hope those painting tips help.

More models are on the way! I should have another 1:100 item going on sale soon. If you play the tabletop wargame Flames of War, I think you're going to like it! It's a V2 rocket! I'll be working on the building instructions this week and with a bit of luck it should be flying it's way to eBay next week!

And now a bit of time and space travelling! I'm a fan of Doctor Who, so it's no surprise that I made a resin Police Box. I'm also a fan of Community, so it's also no surprise that I've made Inspector Spacetimes space and time travelling Red Phone Box as well! If like me you want to follow the Inspectors adventures, there is a link to a new hilarious fan made web series... but where is it? Or do I mean when is it? It's here but watch out for the Cyber-Chaps!!!

Thursday, 6 September 2012

Hello,
Here are some AA, RAC, Phone and Post boxes, hot off the press! I'm rather happy with them! The AA and RAC call boxes were requested by a TT Gauge model enthusiast who wanted them to go with the Police Box model I've made. I thought that a Post box and Phone Box (it's a K9 phone box in case you were wondering) would make nice companion pieces.


They are all 1:100 scale and the sizes range from the smallest Post Box (16mm) to the biggest AA Call Box (28mm). Not on eBay yet but they 'll probably go on next week. I'll also be painting some of them up. Will blog about that when the time comes.

Bye!

Saturday, 1 September 2012

I've put some new items on ebay today.

First off for all you HO Gauge train modellers I have a solid resin nissen hut.

It can be found here.

I have also made the same hut at 1:100 for you TT Gauge peeps although there are currently none on ebay. If you want one, please message me.

the other two items I have made are a bit of a departure from the normal miniatures. They are bas-relief badges/pins and keyrings/fobs for Roller Derby! Being a fan of Roller Derby (my teams being The Atlantic Breakers from Cornwall and Cardiff's Tiger Bay Brawlers) I thought it a fit subject for some badges and keyrings. Both are resin with a bas-relief image.

The badge is a yellow resin with black paint (spayed to seal and protect it) with a brooch pin on the back. Find it here. It measures an inch diameter. The angry face keyring was based on a drawing I made a few years ago and is made with red and black resin. No paint needed! It measures an inch by an inch and a half. Find that one here. I have also made both of them to be either a badge or a keyring by adding or removing the loop on the top. Overall I'm quite happy with them. The two tone resin for the face is rather nifty I think. I made a rectangle bas-relief badge using the Tiger Bay Brawlers logo. I think it came out quite well. I will upload a picture of that in my next blog post. I would like to make more badges based on Roller Derby teams.

Well, the new series of Doctor Who starts soon, so I'm going to watch that... and so should you!